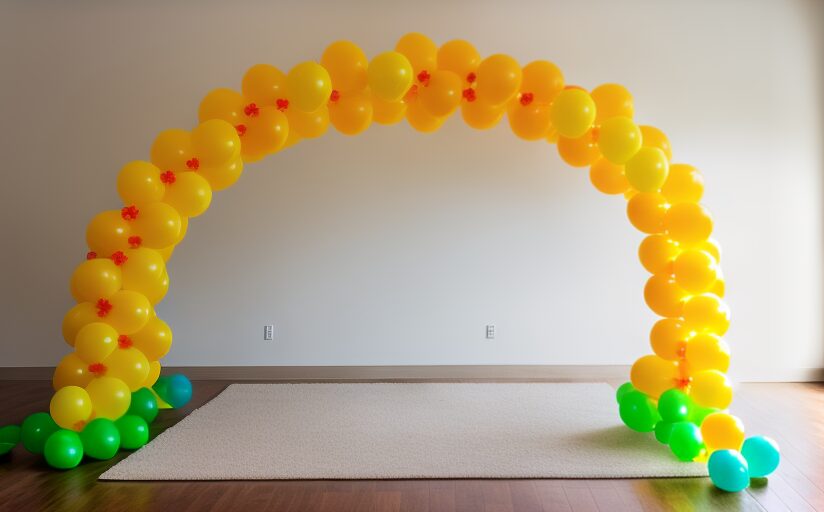
Balloon arches are a fabulous and eye-catching addition to any event or celebration. Whether you’re planning a birthday party, a wedding, a baby shower, or just a fun get-together, a balloon arch can instantly elevate your décor and create a festive atmosphere. The best part? You don’t need to be a professional decorator to make your own stunning balloon arch. In this step-by-step guide, we’ll walk you through the process of creating a beautiful balloon arch that will leave your guests in awe.
Materials You’ll Need
Before we dive into the step-by-step instructions, let’s gather all the materials you’ll need for your DIY balloon arch:
- Balloons: Choose a variety of colors and sizes to suit your event’s theme. It’s a good idea to have both regular-sized and larger balloons for a more dynamic look.
- Balloon pump: This will save you a lot of time and effort when inflating the balloons. Alternatively, you can use a helium tank if you want your arch to float.
- Balloon arch kit: You can purchase a balloon arch kit online or at party supply stores. These kits typically include the arch frame, connectors, and instructions.
- Fishing line or balloon ribbon: You’ll need something to tie the balloons to the arch frame securely.
- Command hooks or other adhesive hooks: These will help you attach the finished arch to a wall or other surface.
- Double-sided tape or glue dots: These will come in handy for any additional decorations or securing the arch to your chosen surface.
Step 1: Inflate Your Balloons
Start by inflating your balloons using the balloon pump or helium tank. It’s essential to have a variety of sizes and colors to create a visually appealing arch. Fill the balloons to their recommended sizes, as over-inflating can lead to popping.
Pro tip: To create a uniform look, use a balloon sizer or a ruler to measure the size of your balloons consistently.
Step 2: Assemble the Arch Frame
If you’ve purchased a balloon arch kit, follow the included instructions to assemble the frame. Typically, these kits come with numbered connectors, making it easy to assemble the frame correctly.
If you don’t have a kit, you can create a simple PVC pipe frame for your balloon arch. Here’s how:
- Purchase PVC pipes and connectors from a hardware store. You’ll need two long vertical pieces for the sides of the arch and one horizontal piece for the top.
- Assemble the frame by connecting the pipes and connectors to form a basic arch shape.
Step 3: Attach the Balloons to the Frame
Now, it’s time to start attaching the inflated balloons to the frame. Tie a piece of fishing line or balloon ribbon to the nozzle of each balloon, leaving enough length to secure it to the frame. You can tie the balloons directly to the frame or use the connectors provided in your balloon arch kit.
Begin by attaching the balloons to the top of the frame and work your way down, creating a cascading effect. Be sure to distribute the colors and sizes evenly for a balanced look.
Pro tip: Vary the heights and angles at which you attach the balloons to add depth and dimension to your arch.
Step 4: Secure the Arch
Once all the balloons are attached, make sure your arch is stable and secure. If you’re using a PVC pipe frame, you can place sandbags or heavy objects at the base to keep it from tipping over.
Step 5: Add Extra Decorations
To make your balloon arch even more special, consider adding extra decorations. You can use double-sided tape or glue dots to attach flowers, ribbons, or greenery to the arch. These additional elements can complement your event’s theme and enhance the overall aesthetic.
Step 6: Hang Your Balloon Arch
Decide where you want to display your balloon arch and use command hooks or other adhesive hooks to hang it securely. Make sure the arch is at the desired height and angle.
Step 7: Final Touches and Maintenance
Once your balloon arch is in place, step back and admire your creation. Make any necessary adjustments to ensure it looks perfect. Check for any deflated balloons and replace them if needed.
Conclusion
Creating your own balloon arch is a fun and rewarding DIY project that can take your party décor to the next level. With the right materials and a little creativity, you can design a stunning balloon arch that will leave a lasting impression on your guests. Whether you’re celebrating a birthday, a wedding, or any other special occasion, your DIY balloon arch is sure to be a showstopper. So, roll up your sleeves, gather your materials, and let your creativity soar as you embark on this exciting balloon arch adventure!


Recent Comments